Practice Retouching :
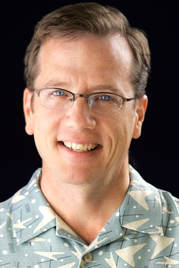
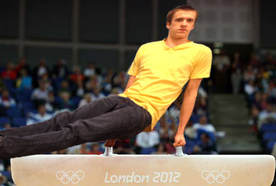
First I fixed the colors, brightness and contrast. Then I fixed with Patch Tool, Clone Stamp Tool and Spot Healing Brush some disturbing factors.
First I had to fix the colors of the picture with Levels, Brightness and Contrast.
Furthermore I used the Patch Tool to select a red writing in the top right corner.
I also fixed his skin and some color spots on his shirt
with the Spot Healing Brush Tool.
I used the Clone Stamp Tool and Healing Brush to fix some smaller disturbing factors.
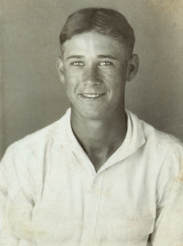
Personal Photo Retouching :
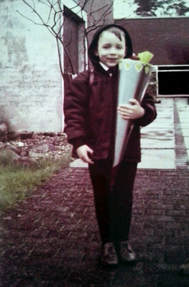
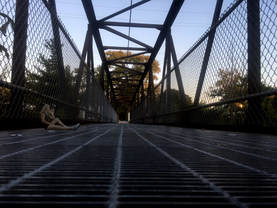
First I had to crop this picture.
After this I fixed in this picture some disturbing factors like a boy
on the right of the boy in the middle who is my dad and other factors
by using the Patch tool, the Spot Healing Brush Tool and the Clone Stamp Tool.
Moreover I used Levels, Brightness and Contrast to fix the colors.
|
|
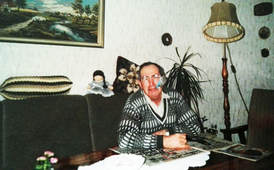
First I had to crop this picture too.
After this I also did Levels, Brightness and Contrast to fix the colors
and used the Patch Tool and the Clone Stamp to fix the colors
of the couch and fixed with Patch Tool and the most with the Spot
Healing Brush Tool disturbing factors.
Personal Selections Project:
First I selected the man in the picture with the Magnetic Lasso Tool and
dragged him in the Olympic-Pictures. I made him fit in the picture by using
Retouching Tools and moving him.
First I selected me/ the character from an other picture and dragged me
in the background, the bridge. I used the Move Tool to move the person
that she fits in the picture and tried with Retouching Tools to make colors and other factors to more fit. In this picture my character feels lonely and
is waiting for her best friend.
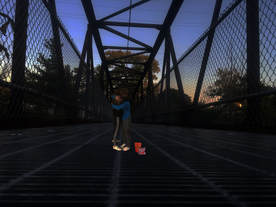
I also first selected the characters and candies from another picture and dragged them in there, used Move and Retouching Tools to make them fit
and change Brightness and Contrast, so it looks darker.
In this pictures the girl's best friend finally arrived with candies which
made him problems to come earlier and they hug each other.
Advanced Compositing
Hands-on Recreation:
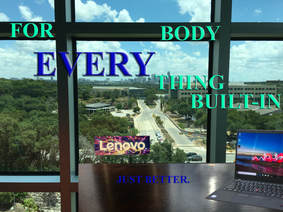
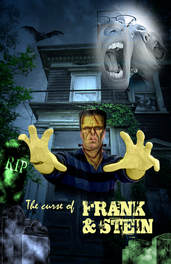
First I selected the table, the computer and the logo with the Polygonal Lasso Tool. I dragged them all in the background picture. After this I made a lot of text boxes for the text and used Blending Options to make them look obvious for the eye.
Choice Project:
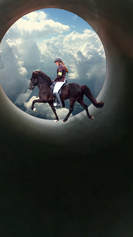
First I edited the foreground picture by cutting my friend out of the hole
and making the "walls" more look smoothly. After I merged them visible, I dragged in the clouds background.
At the end I selected the horse and rider with the Magnetic Lasso Tool and the Lasso Tool and dragged it also in the the picture , so it looks like the rider would be ride in the clouds.
and making the "walls" more look smoothly. After I merged them visible, I dragged in the clouds background.
At the end I selected the horse and rider with the Magnetic Lasso Tool and the Lasso Tool and dragged it also in the the picture , so it looks like the rider would be ride in the clouds.
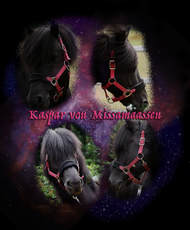
In this picture I had an black background and four selections of a horse.
I dragged the the selections all in the black document and set the selection layers
all in "Lighten", so they interact more smoothly with each other.
After this, I smoothed the the corners of the selections with the brush tool
an a black color with a hardness of 0%. Then I dragged the sparkle, stardust picture in the picture and set it also in "Lighten". I took the Eraser Tool to get rid of the stardust on the selection layers and the corner, also with hardness at 0%, so it looks smoothly.
Ultimately I edited a Text Box and typed in the name of the horse
and used "Blending Options" to make the text more obvious for the eye.
Painting Practice:
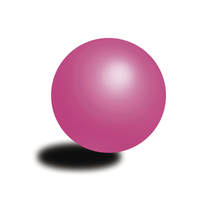
First we made a circle with the Elliptical Marquee Tool. Then we selected a color and colored the entire circle. We used the Burn and Dodge Tool to highlight and shade the sphere. Ultimately we added a shadow.

I used the Mixer Brush Tool to paint over the picture with the "dry" option.
After this I mixed the colors and smoothed the together by using the "wet" option.
I did the same thing here, I painted first everything over with the dry option and afterwards I will smoothed everything with the wet option.
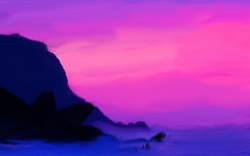
Painting Project:
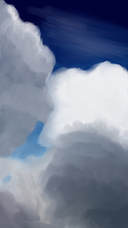
In this picture I first selected the clouds and tried with circles to form clouds. With the wet option I smoothed them a bit. Afterwards I did the blue sky and ultimately improved some mistakes.
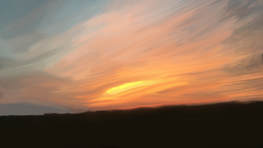
Firstly, I painted the dark landscape at the bottom of the picture over.
Then I started in the left top corner and selected each color and painted them over with the dry option. Finally, I smoothed the color together with the wet option and after each line, I cleaned the brush.
Then I started in the left top corner and selected each color and painted them over with the dry option. Finally, I smoothed the color together with the wet option and after each line, I cleaned the brush.
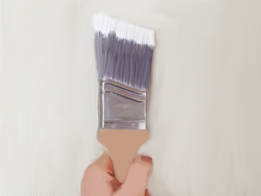
The first thing what I did in this picture was painting over the wall in the background with the wet option. Secondly I did the bristles of the brush. First the purple color, then the white on top of the bristles. With the moist option I did the grey metal part by selecting each color and often cleaning the brush.
The next thing I did was painting over the wood part of the brush and at the end the hand with the moist and also cleaned the brush after each line.
The next thing I did was painting over the wood part of the brush and at the end the hand with the moist and also cleaned the brush after each line.
Madrigal Program Cover:
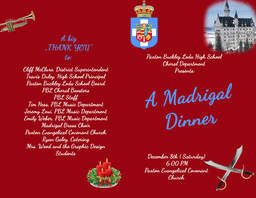
First, I selected the elements like trumpet and candles. Secondly, I dragged them into the red background and moved them to their place. The next step was smoothing the borders of the castle picture with the Brush Tool.
The last step was typing the text on the cover and let it fit with the colors and size to the selection and the program itself.
The last step was typing the text on the cover and let it fit with the colors and size to the selection and the program itself.
